Sketchnotes experiment part 3: Data Repository with Flume
This post is part of a series. Here’s the introduction and overview.
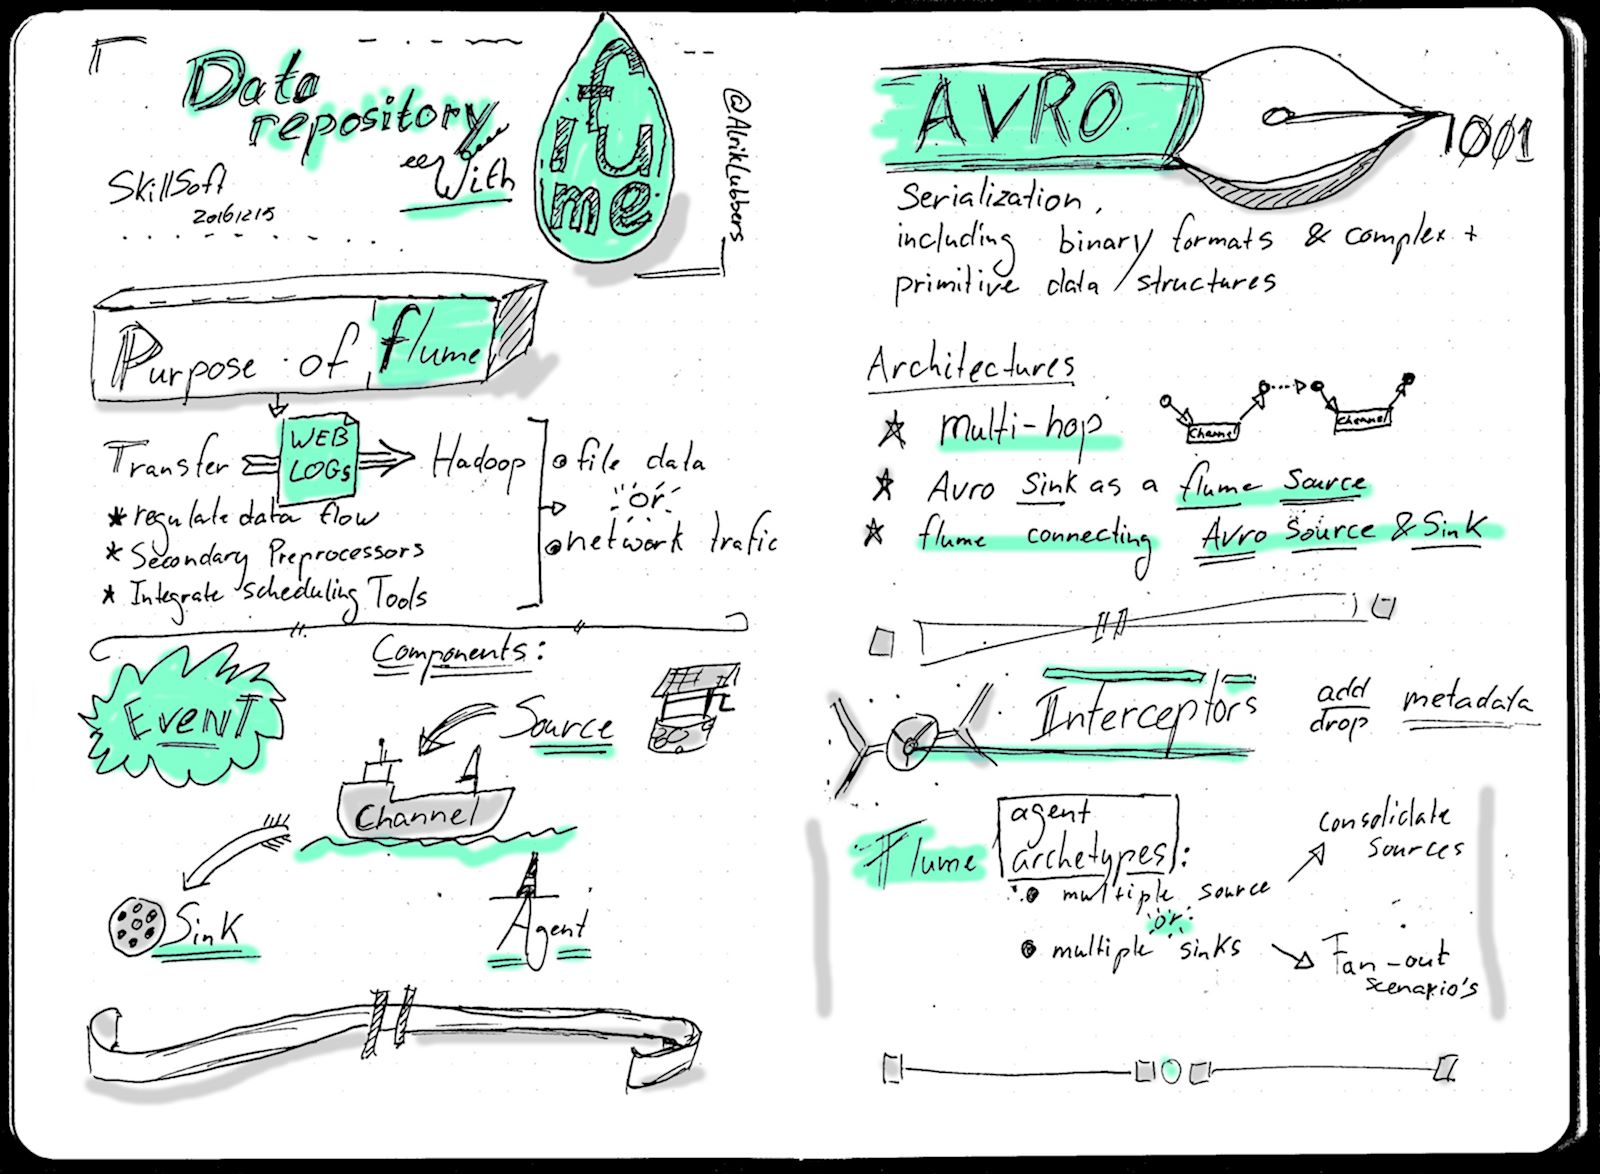
Final image
Sketchnoting
The A5 size notebook really seems to force me into a linear sketchnote format. This isn’t necessarily a bad thing, but it kind of limits the options for experimenting with different formats. Lessons learned during this experiment:
- Slowly I’m starting to use more images to tell the story, which I like;
- Playing with words and images results in content that is easier to remember and recall. I’m thinking of elements like “Interceptor” and the concept of serialization with an old fashioned ink pen (the execution of the pen is less than stellar, though), . .
- The overall image has a nice use of available space.
Post-processing
The processing steps for this image created the mold for most of the images after this one.
- Straighten and crop the scanned image;
- Apply an Unsharpen mask (radius: 5.0, Amount: 4.0, threshold:0). This helps to get rid of blurred areas in the scan, which resulted in faded lines when converting to B&W. The amount can be significant because the next step is - ;
- Apply a Threshold (play with the values, but in this case I ended up with 100 and 255);
- Clean up the image. A blinding flash of the obvious showed me that a Pencil tool with Black and White is all you need…
- Apply a small Gaussian blur (2,0 x 2,0). This takes off the sharp edges from the lines and results in a more natural “feel” of the inking.
- Add colour and grey accents.
I didn’t add Despeckle for once. These steps seem to clean up the image while leaving enough “meat” to the drawing.
I need to get up to speed with my Wacom pen and tablet, though. The lines are not getting any straighter…
More tk